Science project
How to Make A Thermometer

Thermometers tell us important information, like whether we should bring a parka or swimsuit when we go on vacation! There are two well known temperature scales: Fahrenheit (F for short) and Celsius (C for short). Most people in the United States use the Fahrenheit scale; scientists and the rest of the world use the Celsius scale. The same number means very different things in the two scales. For instance, a comfortable room is 22 degrees in Celsius, but if a room was 22 degrees Fahrenheit, it would be below freezing and your fingers would be frostbitten in no time.
Temperature scales are pretty cool, but it's more fun to investigate how thermometers actually measure temperature changes. The key component is the liquid inside that moves up and down to indicate different numbers. What causes the liquid to move up and down? How do scientists choose what liquid to put inside?
In this project, you’re going to learn how to make a thermometer. You will also investigate which liquids work best for thermometers by making three of them—each with a different liquid.
Problem
How does a thermometer measure temperature?
Materials
- Refrigerator
- At least three equally-sized small glass bottles or jars, ideally with metal lids. Baby food jars work great.
- Adult helper
- Small nail
- Hammer
- Drinking straws (the narrower the better—short, hollow beverage stirrers work great. Transparent straws are best—this way, you can see colored liquid through it)
- Masking tape
- Waterproof marker
- Modeling clay or hot glue gun
- Water
- Rubbing (isopropyl) alcohol
- Food coloring
- Spoon
Optional:
- Hot water (just slightly warmer than bathtub water)
- Heat resistant bowl or large measuring cup
Procedure
- Chill your containers of rubbing alcohol and water in the refrigerator.
- Using the masking tape and waterproof marker, label your three containers. The first one should be labeled water, the second should be labeled rubbing alcohol, and the third should be labeled water + rubbing alcohol. The type of liquid in the thermometer is your variable in this investigation. Why do you think we should you try to keep everything else about your thermometers the same?
- Remove the lid from each of your glass jars.
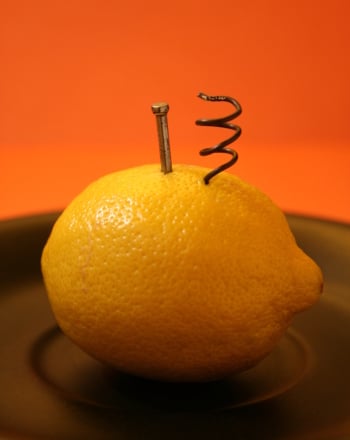
- Have your adult helper hammer a small nail through the center of each container’s lid. These holes should be about the same diameter as that of your straws.
- Carefully push a straw though each of the holes. The straws should fit snugly in the holes, but not be pinched. At least an inch of the straw should be below the lid. This will vary depending on the size of your container and length of your straws.
- Use the modeling clay or hot glue gun to completely seal the base of the straw around the openings. (If air can escape from the hole around your straw, your thermometer will not work! Why do you think this is?)
- Fill container you labeled water with the chilled water.
- Add a couple drops of food coloring. Stir.
- Adjust your lid so that the bottom of the straw is submerged in at least 1/2 inch of liquid. The bottom of the straw should not touch the bottom of your container.
- Screw the lid on tightly while making sure that your clay is still sealing the hole. We want to make sure that the jar is completely airtight. Why do you think this is important?
- Record how high the liquid is in the straw. Put the thermometer back in the refrigerator.
- Repeat steps 6-11 using chilled rubbing alcohol instead of water.
- Record where the line of liquid is in the straw. Put this thermometer back in the refrigerator.
- Mix equal parts chilled water and alcohol. The actual amounts will depend on the size of your container.
- Repeat steps 6-11 using the water-alcohol mixture to make a third thermometer.
- Record where the line of liquid is in the straw. Put this thermometer back in the refrigerator.
- Now, put your thermometers in a warm place. Every minute for ten minutes, observe the level of liquid in each straw (if you don’t notice any change, recheck the seals on your thermometers).
Hint: If you still aren’t seeing much liquid movement, you might try creating more of a temperature change by placing your thermometers in a container of hot water.
Results
The thermometer made with the rubbing alcohol should show the fastest and most significant liquid movement. The thermometer made with water should show the slowest and least significant liquid movement. The thermometer made with alcohol and water should fall somewhere in between. Your results may vary because keeping the thermometers sealed can be tricky!
Why
Here’s how thermometers work: as the thermometer’s surroundings get warmer, the liquid inside a thermometer expands and travels up the tube. As the thermometer’s surroundings get colder, the liquid inside the thermometer contracts, causing the liquid travel back down the tube. The liquid is forced up the straw when it expands because that's the only place for it to go. It can't push the air out of the jar, because we made sure the edges of our jar airtight!
So why did alcohol perform the best? Water is very slow to expand or contract when it is exposed to hot or cold compared to alcohol. Water can absorb or lose a lot of energy without changing very much—that’s part of the reason why water is such a great home for living things, but also why it doesn’t make for the greatest thermometer liquid.
Going Further: You might try other liquids, like oil or liquid soap. If you want to do some research, you might find out why thermometers used to be filled with liquid mercury, and why mercury is no longer used.
Education.com provides the Science Fair Project Ideas for informational purposes only. Education.com does not make any guarantee or representation regarding the Science Fair Project Ideas and is not responsible or liable for any loss or damage, directly or indirectly, caused by your use of such information. By accessing the Science Fair Project Ideas, you waive and renounce any claims against Education.com that arise thereof. In addition, your access to Education.com's website and Science Fair Project Ideas is covered by Education.com's Privacy Policy and site Terms of Use, which include limitations on Education.com's liability.
Warning is hereby given that not all Project Ideas are appropriate for all individuals or in all circumstances. Implementation of any Science Project Idea should be undertaken only in appropriate settings and with appropriate parental or other supervision. Reading and following the safety precautions of all materials used in a project is the sole responsibility of each individual. For further information, consult your state's handbook of Science Safety.
Related learning resources