Science project
Identifying Rocks and Minerals

Can you be a mineral detective? In this cool experiment on identifying rocks and minerals for kids, you’ll develop an understanding of some of the characteristics of different minerals. Minerals look, feel, and react differently when you test them in different ways. Check out your rock identification skills by conducting tests on mystery rocks.
Problem:
Based on mineral tests, try to determine the properties of different mystery rocks.
Materials:
- Several samples of unknown minerals
- Magnifying glass
- Penny
- Lamp
- Steel nail
- Streak plate (available for purchase online through lab supply stores)
- Glass plate (one from a picture frame works well)
- Small yogurt container (emptied and dried)
- Kitchen scale
- Small bowl
- Water
- Measuring cup (with measuring units in milliliters)
Procedure:
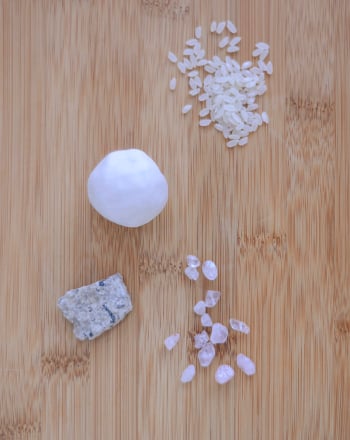
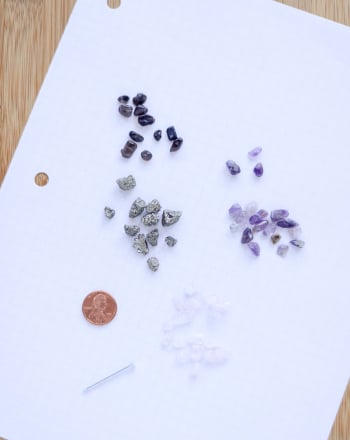
- Collect several minerals. You can either get different rocks from the area around your home, or you can get pure minerals from a rock store. Choose minerals that have not gone through a rock tumbler. Make sure that you get mystery minerals – it’s more fun to test them if you don’t know what they are. Assign a number to each mineral.
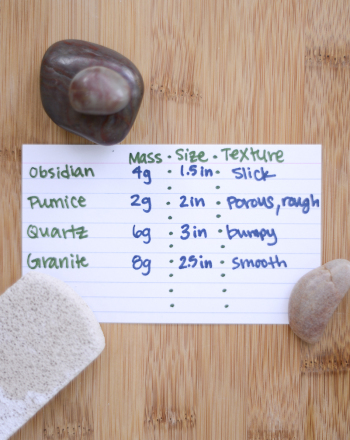
- Create a chart that has six columns. In the first column, you will place the number of your mineral. The second will be for color, the third for luster, the fourth for hardness, the fifth for streak, and the sixth for specific gravity. Put this chart on a big piece of paper so that you have lots of room for notes.
- Minerals are different colors. What color or colors are in each of your samples? Write it down in your chart in the color column.
- Minerals also look different when you put them under a light. This is called luster. Using the light and the magnifying glass, look at the surface of each mineral. Does the mineral look dull, metallic, shiny, glassy, resinous, pearly, oily, or silky? Resinous means that it looks like tree sap, and pearly means that it looks like a pearl. Record your observations in your chart.
- Now you’re going to test to see how hard your minerals are. Believe it or not, rocks can be soft! First, use your fingernail to see if you can scratch each one. If you can, it is less than 2.5 on the hardness scale. Now use the coin to see if you can scratch each mineral. Does it make a mark? If so, it’s under 3.5 on the hardness scale. Try scratching it with the nail. If it gets scratched, it’s under 5.5 on the scale. Finally, if your mineral didn’t get scratched by any of the first three items, use it to scratch the glass. If it does, it’s over 6 on the hardness scale. Record the approximate hardness of each mineral in your chart (e.g., if you were able to scratch the rock with your fingernail, you would write "<2.5" in your chart).
- Take the streak plate and put it on a flat surface. Push each mineral down onto the surface and rub it across. Does it make a streak? Write down the color of the streak in your chart.
- Finally, you’ll test the specific gravity of your minerals. This is a little messy, so find a surface that can get wet. First, weigh each mineral on the kitchen scale and write down its weight. Next, fill your yogurt container to the brim with water and place it in a bowl. Gently place your mineral into the yogurt container. Collect the water that pours over the top of the container, and measure it in a measuring cup. Divide the mineral’s weight in grams by the volume of water in milliliters to get the specific gravity of each mineral. Record the specific gravity of each mineral in your chart.
What are the properties of your minerals? Do you know what they are? How do they compare to the properties of some of the most common minerals (below)?
Results:
Your results will be different depending on what minerals you used in your experiment.
What are the properties of the different minerals that you have, and how do they compare to other common minerals? Can you identify what rocks you might have based on their properties?
Some Common Minerals and Their Properties
|
Mineral |
Luster |
Hardness |
Streak |
Specific Gravity |
|
Graphite |
Metallic |
1 |
Black |
2.1-2.3 |
|
Halite |
Glassy |
2.5 |
No color |
2.2 |
|
Calcite |
Glassy |
3 |
No color |
2.7 |
|
Magnetite |
Dull |
5.5-6.5 |
Black |
5.2 |
|
Pyrite |
Metallic |
6-6.5 |
Gold |
4.9-5.2 |
|
Feldspar |
Glassy |
6-6.5 |
Different colors |
2.5-2.75 |
|
Quartz |
Glassy |
7 |
Different colors |
2.6-2.7 |
Why?
Geologists study rocks and minerals, and part of the process of studying rocks is identifying them. Different rocks and minerals are found in different places, and this can help geologists figure out what rocks they might have.
Another way to determine what rock or mineral you have is to look at its characteristics. Like plants and animals, rocks have characteristics that help us determine what they are. Some are very hard, while others break easily. Rocks are different colors, and they shine differently in the light.
In this experiment, you used minerals. While rocks can have many minerals in them, minerals are pure and have definite characteristics. In the geology world, rocks are more like a salad, and minerals are like the salad ingredients.
Why do rocks and minerals have different characteristics? There are many reasons. They’re made out of different elements that are put together in different crystal structures. You may have chosen quartz in your experiment. This common mineral is made from silicon dioxide (silicon and oxygen). A diamond is made out of pure carbon. So is graphite. The difference is that their crystals are organized differently. It’s like taking an equal number of blocks and arranging them in different ways. They make different structures, but they’re still the same blocks.
What minerals are in the common rocks around your home?
Education.com provides the Science Fair Project Ideas for informational purposes only. Education.com does not make any guarantee or representation regarding the Science Fair Project Ideas and is not responsible or liable for any loss or damage, directly or indirectly, caused by your use of such information. By accessing the Science Fair Project Ideas, you waive and renounce any claims against Education.com that arise thereof. In addition, your access to Education.com's website and Science Fair Project Ideas is covered by Education.com's Privacy Policy and site Terms of Use, which include limitations on Education.com's liability.
Warning is hereby given that not all Project Ideas are appropriate for all individuals or in all circumstances. Implementation of any Science Project Idea should be undertaken only in appropriate settings and with appropriate parental or other supervision. Reading and following the safety precautions of all materials used in a project is the sole responsibility of each individual. For further information, consult your state's handbook of Science Safety.
Related learning resources