Science project
Windmill Model Science Project

Windmills are machines that convert energy from the wind into useful work by rotating. The rotation of a windmill often powers a motor or generator used to produce electricity or mechanical work (moving objects). Using wind power to turn the rotation of an object into useful energy and work dates back to 1st century Greece, and wind wheels are also well documented in 7th century Persia. They have been used to lift things up and down, especially water from the ground, to power machines that crush grain and process food, and more recently to power motors to generate electricity.
Windmills are good examples of wheel-and-axle machines. The wheel is able to rotate freely on an axis, harnessing the wind’s energy to move it by having sails, or shapes that can catch the wind.
Which windmill design is the sturdiest? Which will be better at producing work?
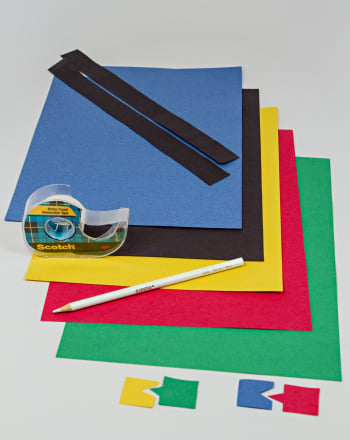
Materials
- Construction paper
- Cardstock
- Printer paper
- Plastic straws
- String
- Paperclip
- Tape
- Scissors
- Glue
- Wooden skewers
- Hole punch
Procedure
- Cut out a square of each type of paper.
- Draw an X diagonally, from corner to corner, on each one.
- Use a hole punch to make a hole in the center large enough for the straw to fit through.
- Cut along each line, but stop about half an inch from the center hole.
- Bring each free corner down to where the cut stops near the center of the paper and secure it with glue. This will create the ‘sails’ for your windmill.
- Insert a straw through the center of each windmill, this will serve as the axis.
- Insert a wooden skewer through the straw so it can rotate freely.
- Towards the end of the straw, tape one end of a piece of string to the straw. Tie or tape the other end of the string to a paperclip.
- Hold the ends of the wooden skewer and blow on the sails of your windmill model. What happens? Which windmill works the best and why?

Results
The string will wind around the straw as the windmill moves and the paper clip will be lifted. Cardstock will likely produce the best sails because it is the stiffest. Printer paper will have the weakest sails.
Why?
The shape created when folding the corners of the paper into the center creates a sail, which will catch your breath when you blow on it. Your breath will then rotate the wheel, which will rotate the axis. Because the axis is connected to the string and the dangling paper clip, it will convert the energy from your breath, harnessed by the wheel, into useful work by twisting up the string and lifting the paperclip.
Going Further
You can also build a model of a waterwheel, which uses the same wheel-and-axle machine concept behind the windmill.
Materials
- 2 Liter plastic bottle
- Empty thread spool
- 2 Index cards
- Pencil
- Tape
- String
- Paperclip
- Glue
Procedure
- Cut off the top of a 2 liter soda bottle at the point when it starts to narrow.
- Cut two slits about 2 inches long and half an inch wide on the top edge, directly across from each other.
- Cut four holes near the base of the bottle about a quarter of an inch wide.
- Cut the index cards so that you have four blades that are the length of the spool.
- Make a small crease on the sides of the index cards to glue the blades to the spool, evenly spaced. Wait for the glue to dry completely.
- Put a pencil through the hole in the middle of the spool.
- Tie one end of the string (about 1 foot long) to the paper clip and glue the other end to the pencil. Let dry completely.
- Rest each end of the pencil in the slits you made at the top of the bottle.
- Place your waterwheel under a faucet, positioning the opening over the spool.
- Turn on the faucet.

Results
The water from the faucet will land on the blades and cause the "wheel" to rotate, lifting the string and paper clip.
Education.com provides the Science Fair Project Ideas for informational purposes only. Education.com does not make any guarantee or representation regarding the Science Fair Project Ideas and is not responsible or liable for any loss or damage, directly or indirectly, caused by your use of such information. By accessing the Science Fair Project Ideas, you waive and renounce any claims against Education.com that arise thereof. In addition, your access to Education.com's website and Science Fair Project Ideas is covered by Education.com's Privacy Policy and site Terms of Use, which include limitations on Education.com's liability.
Warning is hereby given that not all Project Ideas are appropriate for all individuals or in all circumstances. Implementation of any Science Project Idea should be undertaken only in appropriate settings and with appropriate parental or other supervision. Reading and following the safety precautions of all materials used in a project is the sole responsibility of each individual. For further information, consult your state's handbook of Science Safety.
Related learning resources